Flick Depth Standards
Dynamic Verification of Roundness Instruments
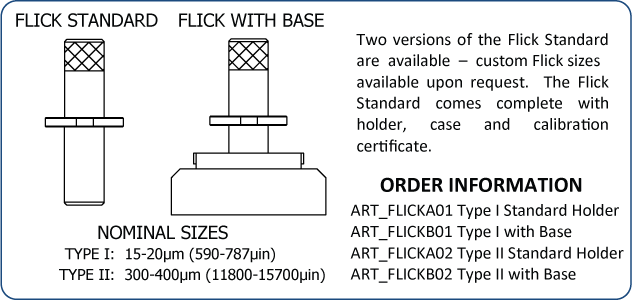
Modern roundness instruments are normally set up to calibrate probe amplification statically through known heights most commonly achieved through the use of gage blocks. This static approach makes it necessary to perform a dynamic verification of the frequency response of the probing system. The best method of verification of this dynamic verification is made through the use of a “Flick” standard. The “Flick” standard is a cylindrical artifact with a known nominally flat area.
EMI Gage produces high precision “Flick” standards that have been calibrated through our ISO/IEC 17025 certified laboratory. These “Flick” standards are provided with a certificate that details the values of the “Flick” with respect to standard filters and tip radii combinations*. The calibrated “Flick” allows the user to easily determine that the roundness measuring gain settings are performing correctly.
The dynamic verification using the “Flick” standard is rapidly performed and can be implemented into daily verification protocols allowing the user to have an increased confidence that the instrument is functioning correctly.
EMI Gage Laboratory Flick Standard Analysis


EMI Gage is not in any way associated with, sponsored by, approved by, authorized by or affiliated with Taylor Hobson. EMI Gage products are manufactured solely by EMI Gage. EMI Gage products and services are not genuine Taylor Hobson products nor are they sponsored by, authorized by or approved by Taylor Hobson. See also Terms and Conditions.